|
|
|
Transforming
your analogue audio library
by Alan Zisman (c) 2002 First published in The Computer Paper (Ontario edition), August 2003 Utilities
like Groove Mechanic simplify shift from tapes, LPs to CDs If you started listening to music prior to the debut of CDs, you probably have a bunch of music in pre-digital formats: vinyl LPs, cassette tapes, and maybe even eight-tracks. If you have a personal computer with a CD burner, you can make your own CDs out of this music. Doing this is completely legal; you can make copies of the music you own for your own use.
Burning digital CD copies of your analogue LPs or audio tapes is more complicated than simply making a greatest hits CD from tunes that are already in digital format. It can be done, though, and it isn't rocket science.
Connect The first step is to get your computer and your audio gear into the same room. Then you can connect your home stereo equipment to your computer. You will probably need a few cables, which can be found at Radio Shack or other electronics stores.
Best is to use a line-out (or "play") jack on a tape player or "record" jack on a receiver, if available. If not, you can plug into a tape player's headphone jack, but you'll need to watch your volume levels carefully. Depending on your equipment, you may need a cable with either a pair of mono RCA jacks or a stereo 1/8-inch mini plug--the same sort of plug on the end of most headphone cables that connect to your audio gear.
On the computer end, your cable will need a stereo 1/8-inch mini plug. Most soundcards have two or three jacks; look for the one labeled "line-in." It may have an icon showing an arrow pointing into a diamond shape. In a pinch, check your sound card's documentation or just experiment.
To reach between your audio gear and computer, you may need to buy one or more extension cables with a 1/8-inch mini plug on one end and a jack on the other. (Make sure you get stereo cables: the plugs have two black stripes on them).
Don't connect your turntable directly to your computer. Leave your turntable
connected to your receiver (or amp), and either connect your receiver's tape-outputs or your tapedeck's play (or line-out) jacks to your computer. I like to connect the computer to the tapedeck's outputs, as this lets me use the tape deck's level controls to help in the next step. Many recent Macintosh models have a headphone-out jack but no audio input jack. On these Macs, you need a USB audio device such as the $70 iMic (www.griffintechnology.com). Plug it into a USB port, then plug the cable from your audio gear into its input jack.
Set levels
In recording, level refers to the signal strength coming in. A low level will result in a recording that is barely audible above the inevitable background noise. If you later boost the volume, you're also amplifying the noise. A signal that's too strong will be harsh and distorted. You want a signal that's in between: just right.
Recording gear uses VU meters to show recording levels--they are either a pair of flashing lights or gauges with moving needles. The lower two-thirds of the meter is green; the top (or right-hand) portion is red for danger. Recording software usually displays virtual VU meters. Adjust your input signal volume to keep the signal as high as possible in the green, flashing into the red for fractions of a second at a time. If it stays in the red for extended periods, you'll get a distorted recording.
In Windows XP, go to the Control Panel's Sounds and Audio Devices control panel. (Other operating systems will have similar ways to set levels). On the Volume tab, click on the Advanced button. You should see a set of volume controls. Click on Options, then Properties, and choose settings for Recording, not for Playback. Make sure that the Stereo Mix is selected.
Keep those volume controls onscreen and visible so you
can use them to control your levels. Record
Neither Windows nor the Mac come with particularly usable software for recording. There are a variety of commercial and shareware products that can be used for recording: CoolEdit and SoundForge XP are popular on PCs, as is Peak LE on the Mac. The free, open source Audacity 1.1 is a nice choice for Windows, classic Mac, and Mac OS X platforms (audacity.soundforge.net).
Any of these will let you record each side of your analogue LPs and tapes into large digitized sound files saved on your hard drive--at least once you get optimal recording levels. Afterwards, you can use the same software to chop up the large sound files into the individual tracks.
Doing this manually can get tedious fast, however. (A trick: start at the end of the large sound file, and work backwards, selecting the last track first, and cutting it out, pasting it into a new file. This will generally be faster than cutting from the beginning of the large file).
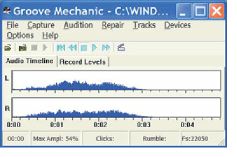
A better choice is the Windows program Groove Mechanic, from Delta, B.C.-based Coyote Software (www.coyotes.bc.ca). You can download a free, 15-day fully functional trial version, after which it costs US$39 to get a registration code to keep using the program.
Like the other programs mentioned, Groove Mechanic can be used to record onto your hard drive, storing the entire side of an LP or tape as a single large file. Like the other programs, it offers metering to allow you to find the best level for recording.
Where it really shines is what happens after you've finished recording a side of an LP or tape.
GM can quickly analyze your recording looking for the silences that indicate breaks between tracks. If asked, it will show a list of what it thinks are the tracks, along with the length of each one. (Check these carefully--on one acoustic recording, it was confused by quiet sections until I adjusted its default settings, letting it find all the tracks correctly.) Then it can quickly and automatically create new audio files, one for each track.
It can also be set to clean up your recordings, filtering out clicks and pops that are common on old scratchy vinyl recordings or the rumble and hiss that is on the background of tapes. I tend to use these filters sparingly, though Groove Mechanic's filters work well and do less harm to the surrounding music than some other products. Again, experiment, find what sounds best to your taste.
Burn
Once you've got your LP or tape recorded onto your hard drive and split into individual tracks, you're finally ready. You can burn them onto a CD or compress them into MP3 or Windows Media format for a portable music player. Now it's no different from working with music that is already digitized. |
|
|
|
|
| Alan Zisman is a Vancouver educator, writer, and computer specialist. He can be reached at E-mail Alan |