ALAN ZISMAN ON
TECHNOLOGY
Stuck on getting photos out of your Mac or iPhone?
By Alan Zisman © 2023-12-06
A friend emailed me yesterday. She said:
I'm having a computer issue and wondering if you're still 'helping' out. It's that I can't upload photos. Mostly I don't know how and can't figure out if I need a specific app or not. And I'm trying to make a photo book for David as a Chanukah present - needless to say, I'm at a brick wall!
With a little gentle probing I found out that the photos were both on her iMac desktop and on her iPhone, in both cases stored in the hardware's version of Apple's Photos app.
We comiserated that one of the nice things about Apple's old iPhotos app (for Macs) was the Projects option - which made it easy to create custom professional-looking books, cards, calendars, and more right in the app, and have them delivered to your door. All with Apple's clean design. Somewhere along the way, that feature disappeared - there's still a My Projects item at the bottom of the Mac's Photos app's left-hand column - but try to add a new project and you're taken to the Mac App Store and present with a list of add-ons to various 3rd-party services.

I've used the first option, Mimeo Photos, and it was okay. It could access photo buried in your Mac's Photo Library just fine, made reasonably attractive books, et al - though without the old-school Apple panache. But if we're using some random 3rd-party service there are lots of options. Here in Vancouver (BC, Canada) for instance, many people use the local London Drugs chain for photo printing - and they even do books/cards/calendars and all that sort of thing, and have a webpage allowing users to upload photos from home, design projects, and more - just like Apple used to do, but letting users work with Windows, Android, and other devices that Apple never dreamed of supporting.
And Apple devices have a bit of a problem compared to Windows computers, Android phones and tablets and the like. And it's by design. That's because Apple's default photo app (cleverly named Photos on both Macs and iOS devices) hides the actual photos - each a separate file - within each device's Photos Library. So when the user of an Apple device goes to the website of a company like London Drugs and tries to Upload Photos, it's not entirely obvious where the photos are on the device. Apple has chosen to protect its users from the complexity of its file system - but that doesn't always make things easier.
Some 3rd-party services have their own apps which may be able to peak inside Apple's Photo Library - London Drugs, for instance, has an app for iPhone/iPad. But it's a bit of a work in progress - the app currently has an item for creating a book - but then states that this functionality is not yet implemented. Maybe later.
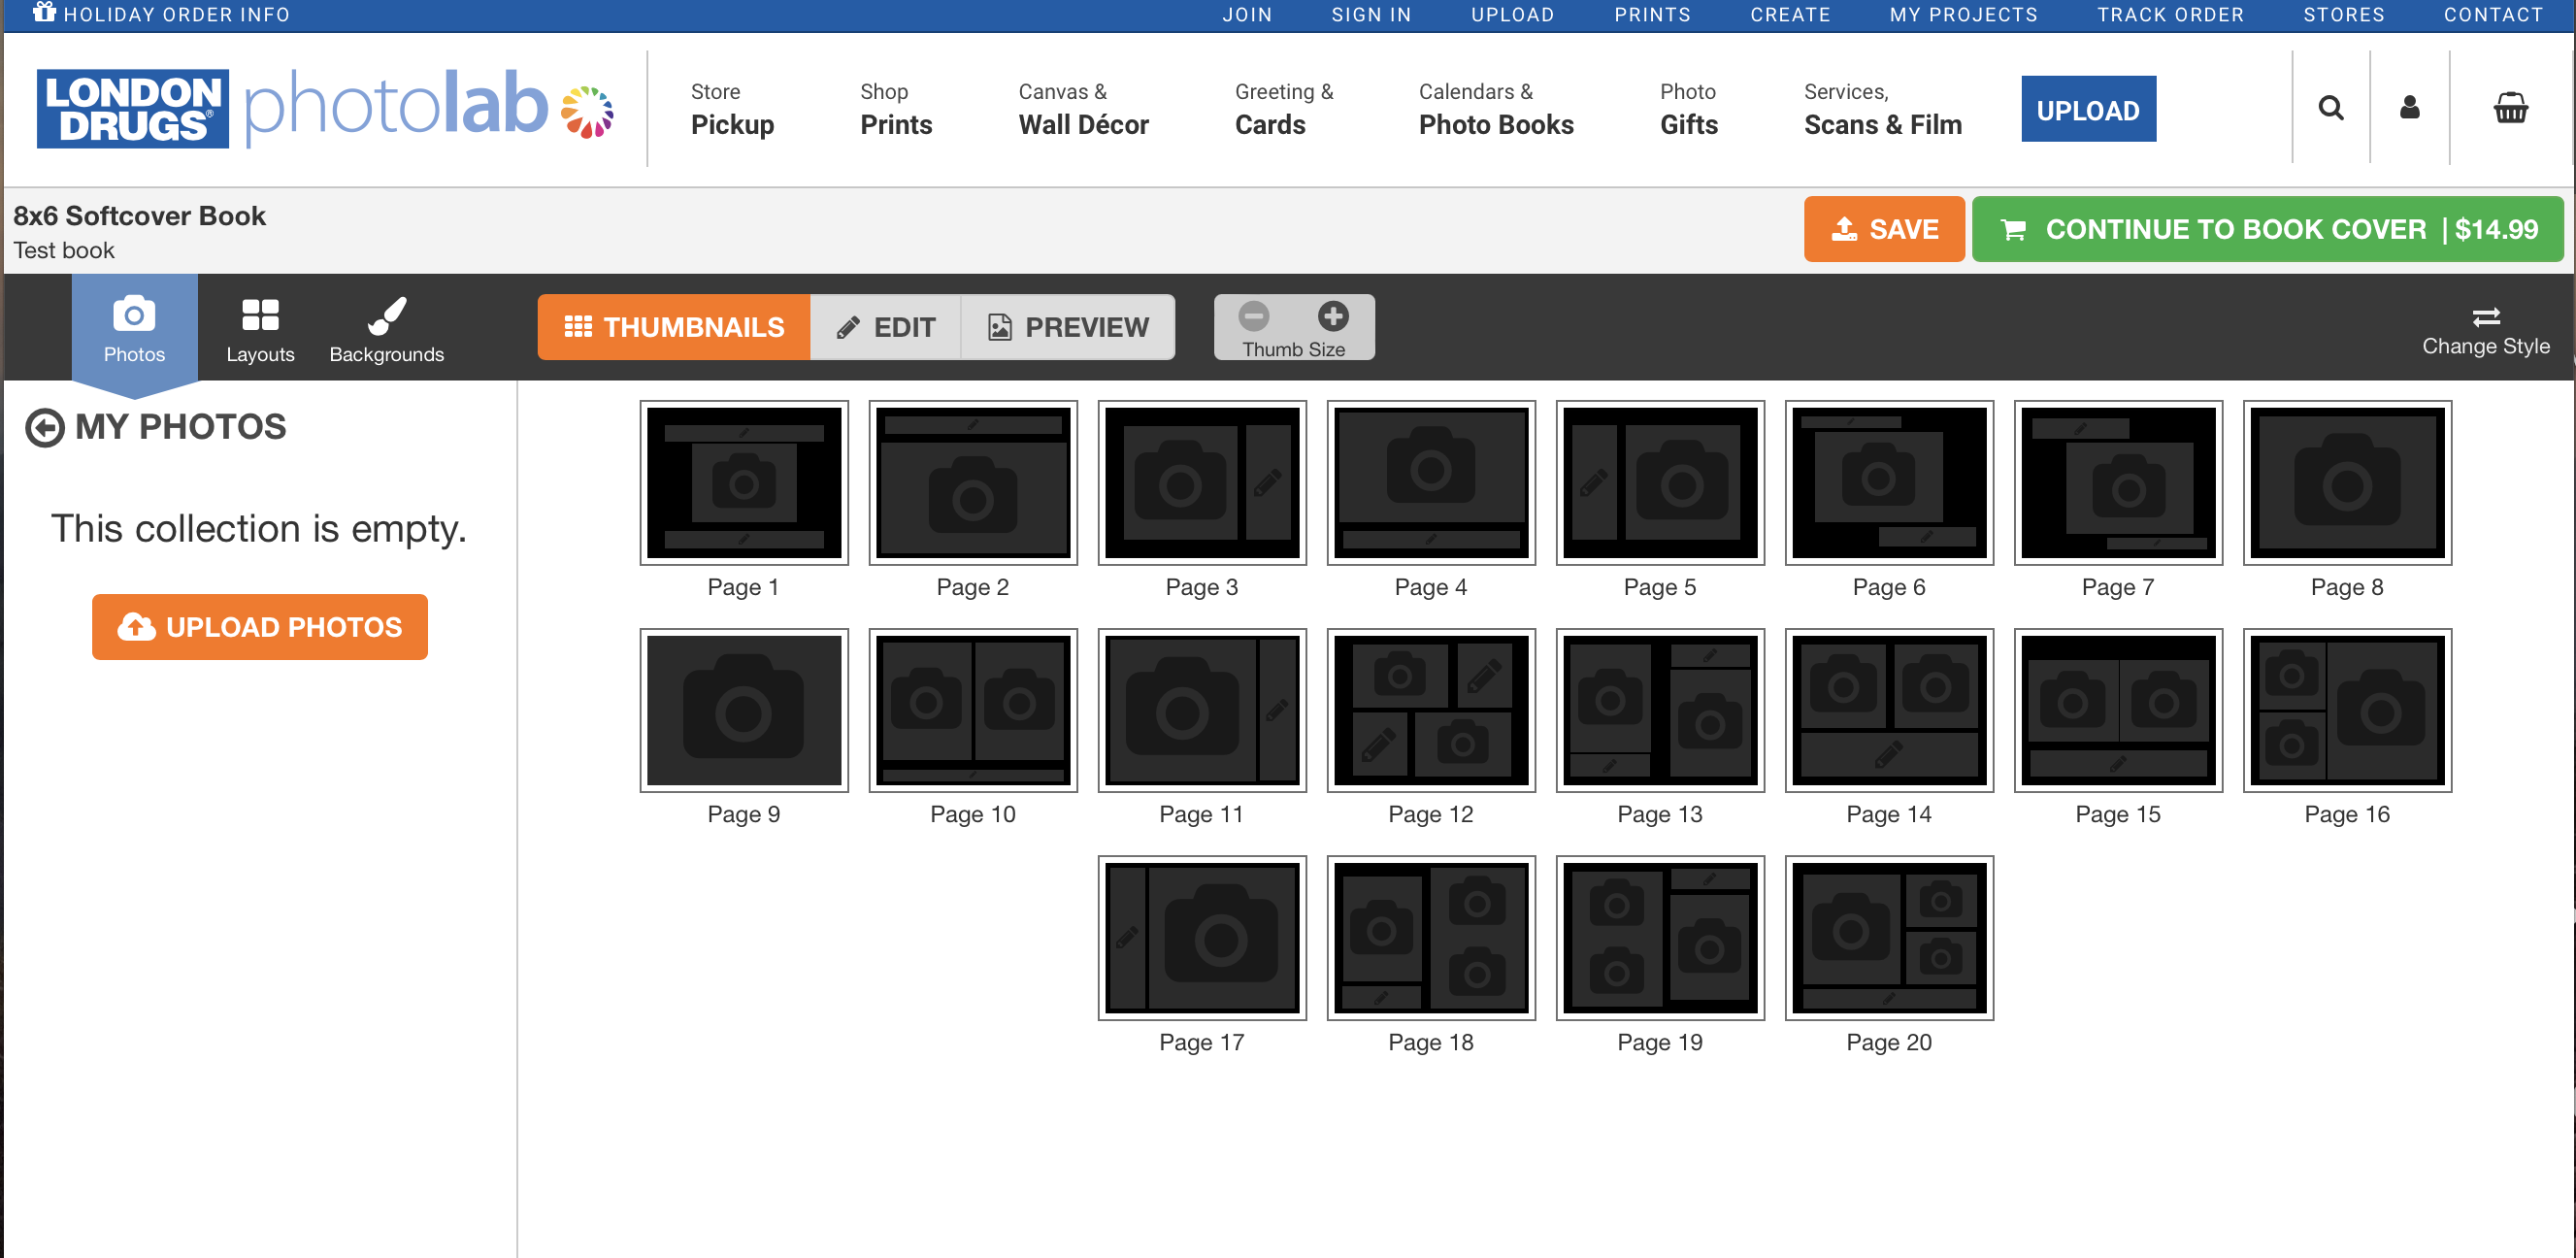
But all is not lost! I went to the London Drugs photofinishing web page on my Macbook and proceeded to walk through the steps to create a new book - there were a few steps to get started, choosing to make a book, choosing the size and number of pages, choosing a theme. Finally, I arrived at a page that showed thumbnails for the book's pages - and on the left, a blank column for the photos, along with an orange link labelled 'Upload Photos':
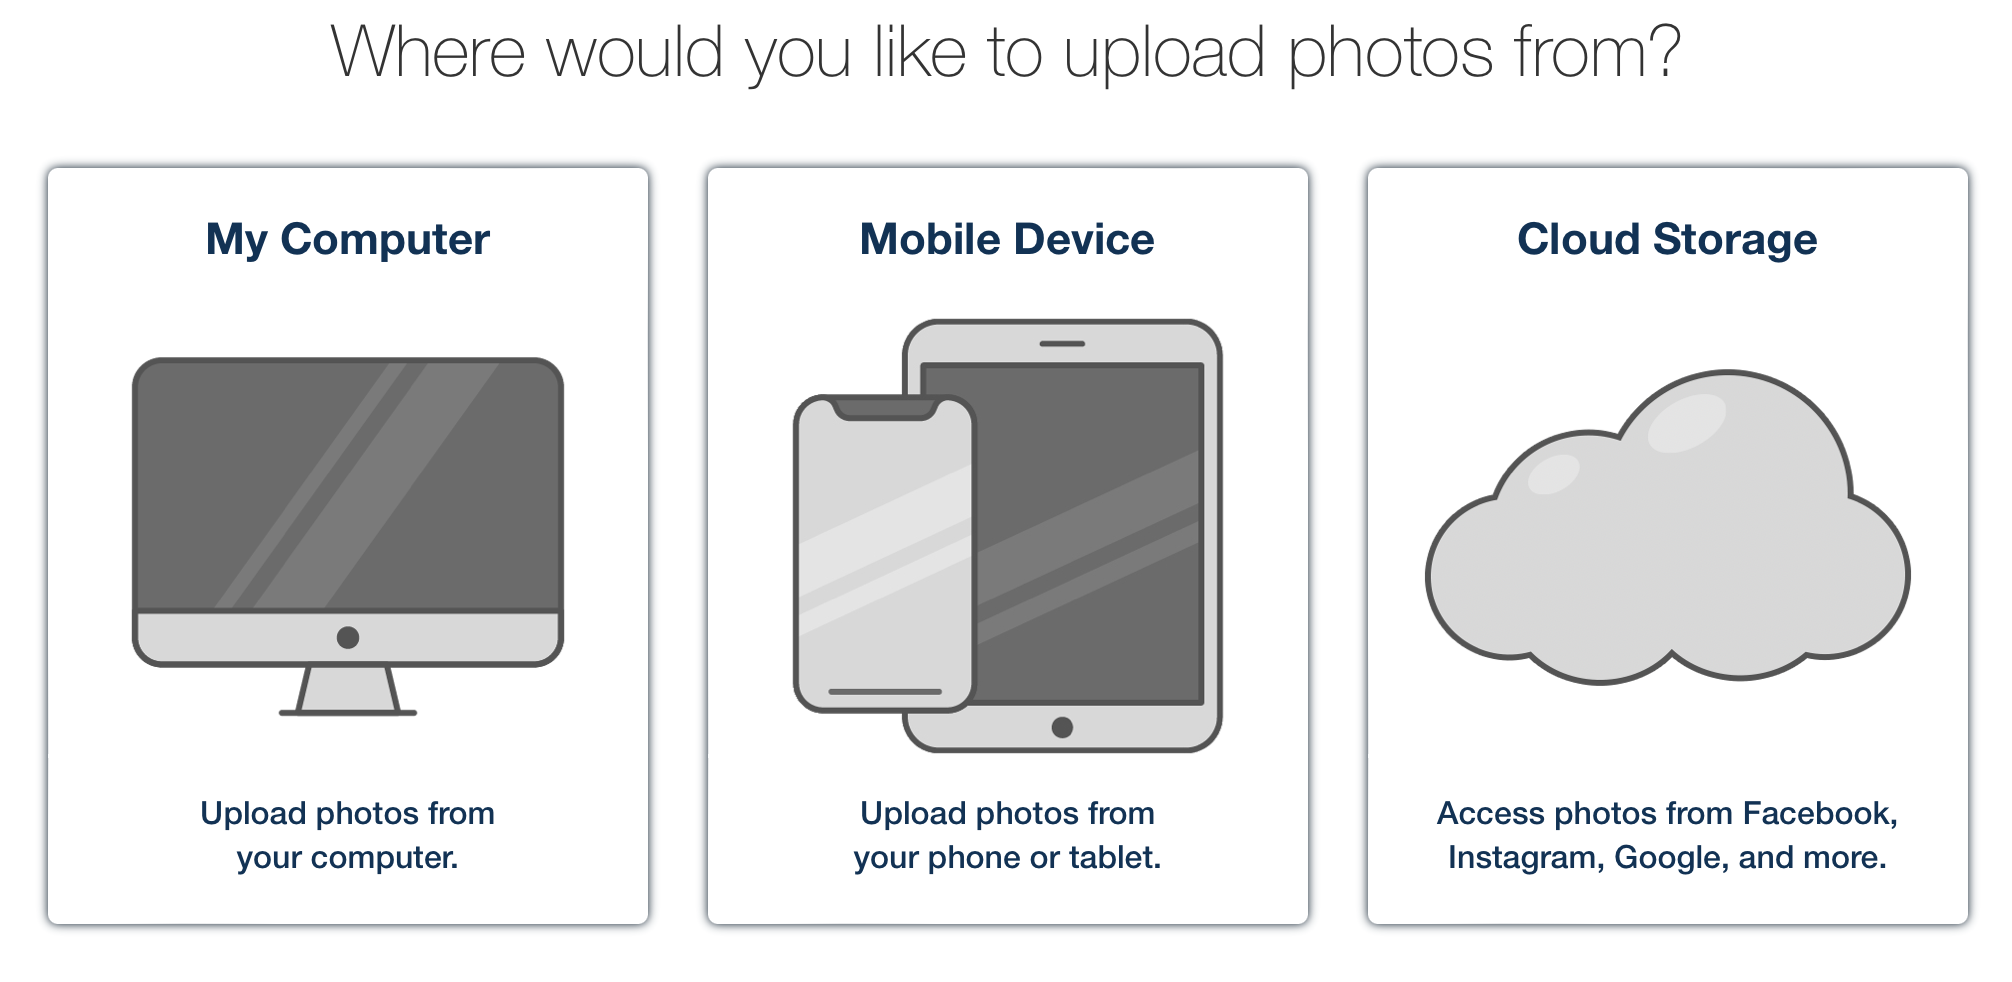
When I click on the orange link, the question is 'upload photos from where?' The options are this computer, a mobile device, or a cloud source:
You can get photos from multiple sources. Let's look at getting some photos from an iPhone or iPad first. So I clicked Mobile Device. That got me an offer to send a text message to my phone or to view a QR symbol - both would direct my phone to a linked webpage.
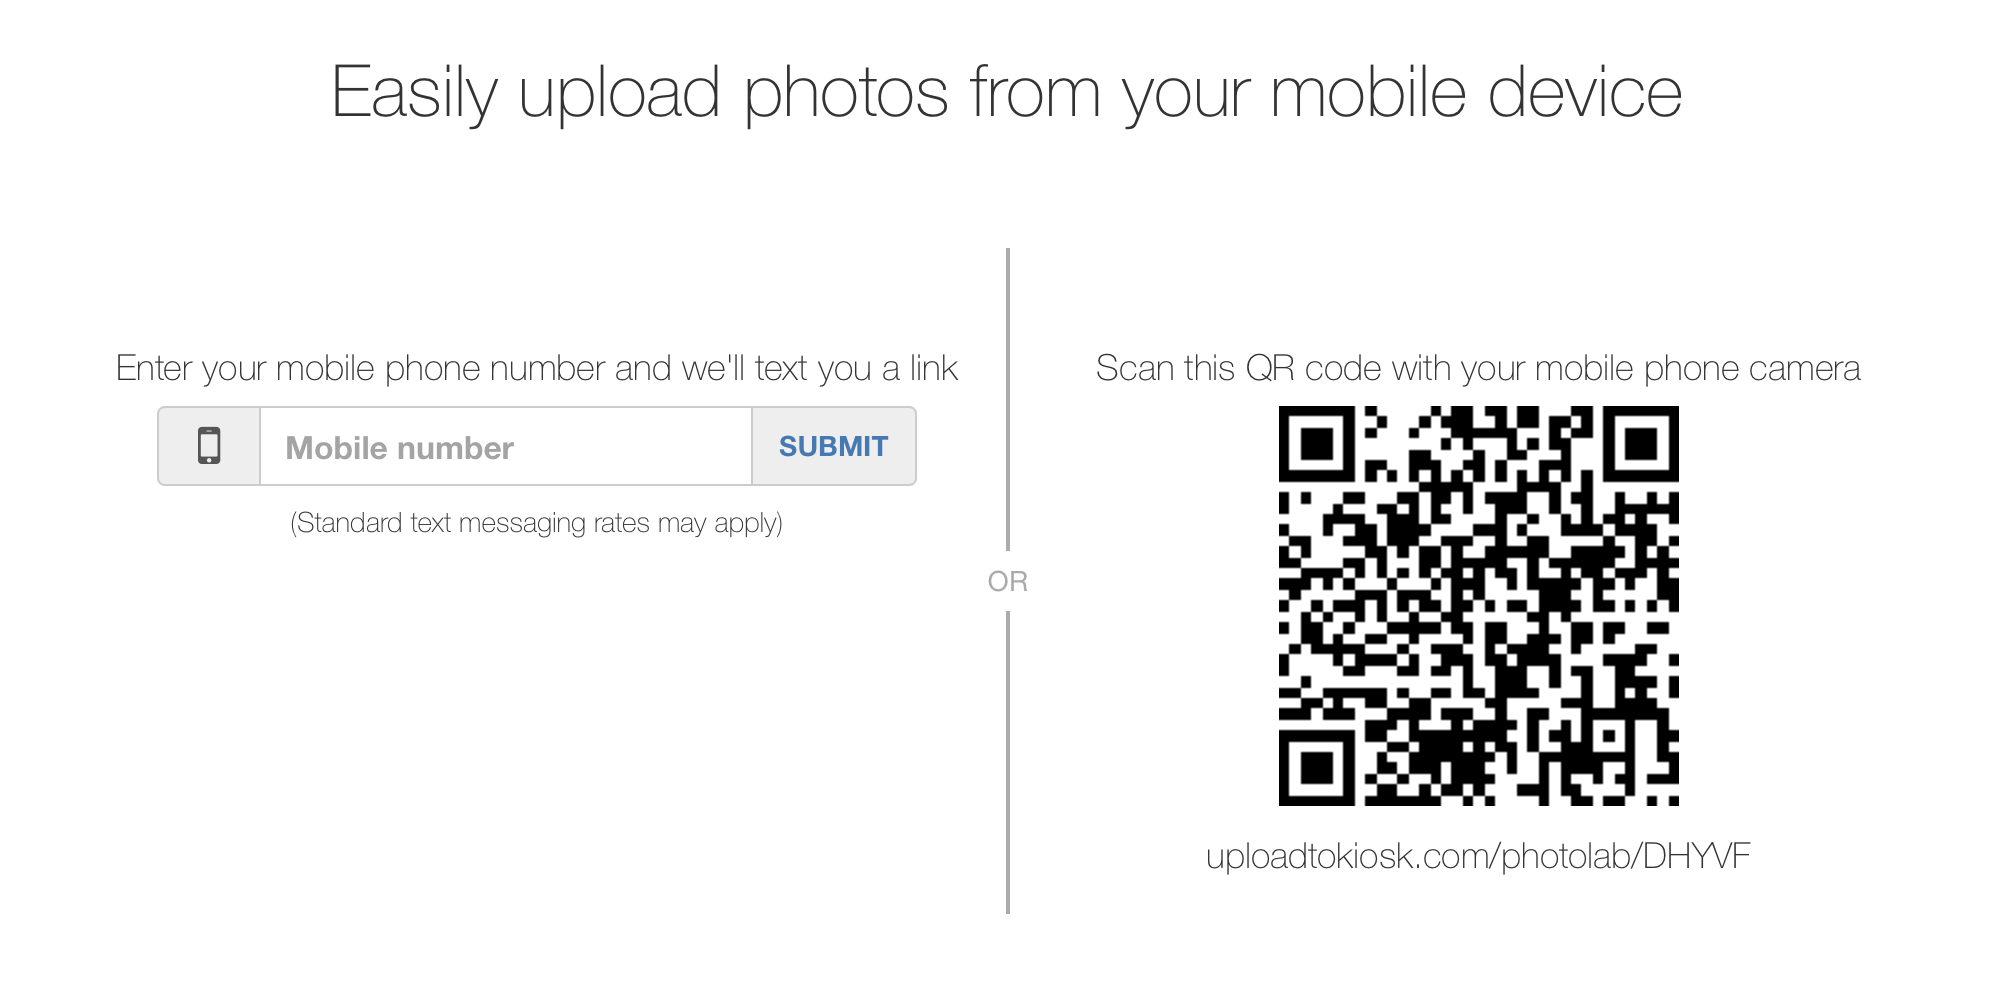
Pointing the camera on my iPad at the image of the QR code on my laptop, a message popped up offering to take me to the webpage listed under the image - there, I was given an option to upload photos from the iPad's Photos Library, and I was able to pick an album, pick the images I wanted to upload and all was well. (Note that uploading multiple images will take a few moments).
I also wanted to upload some images from my laptop's Photos Library - that took a few more steps. It was easy to click on the orange button on the London Drugs web page...
But when I chose to Upload Photos From My Computer, unlike on the iPad, I didn't get an option to peak inside the inscrutible Photos Library - just a standard dialogue box to select files.So we need to pause this for a moment and open the Mac's Photos app.
We have to pick the photos we want to use in the Photos app and set them free - the option we want is referred to as 'Export'. So that requires a couple of steps:
1) Select the photos we want to use. To do that, in the Photos app, you first have to view the photos. Maybe they're already part of a single album, or maybe you have to located them in the chronological list of photos. When you find one, click on it (once) to select it - which will put a blue rectangle around it:
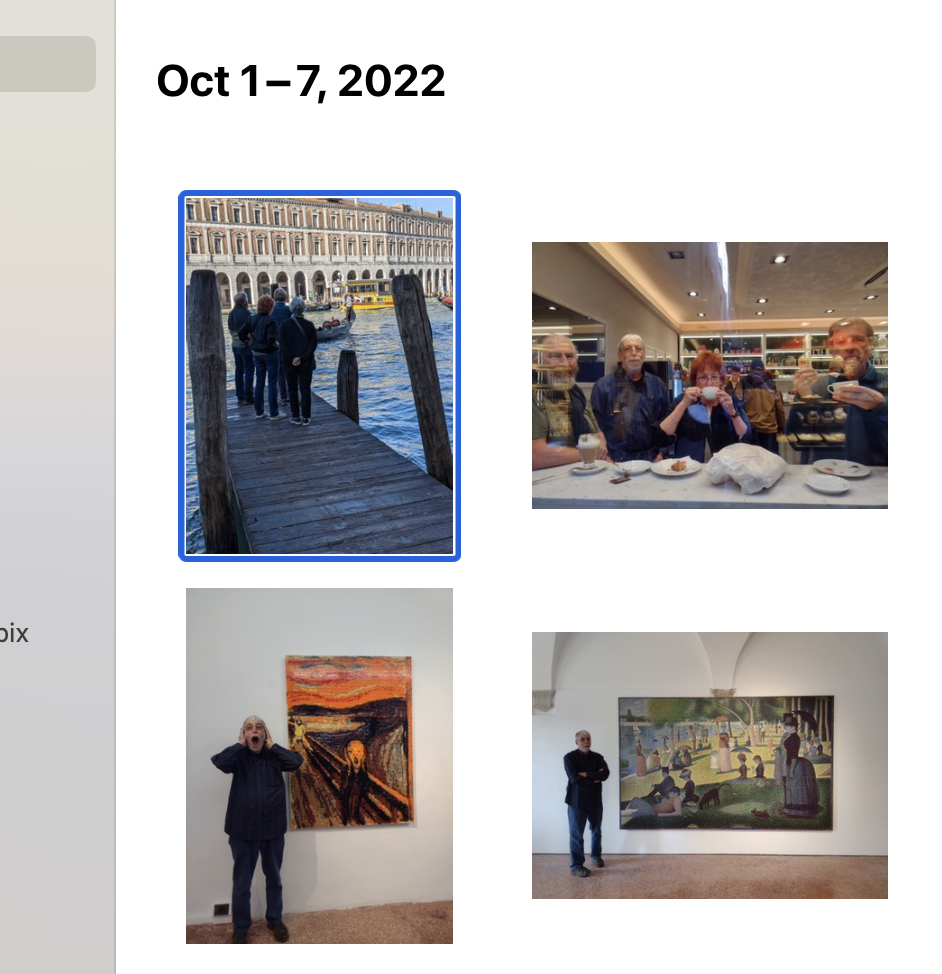
You can select multiple photos at once - if your first photo is in an album, after selecting that one photo, you can click the Edit menu and pick Select All to pick all the photos in the album. (Command + A is a keyboard shortcut to do the same thing). Clicking on the first photo, then holding down Shift and clicking on another photo will select everything between the first image and the one that you shift-clicked.Command+Click lets you select more than one photo while maybe skipping some.
2) Once you've selected the photos you want to use, click on File on the menu bar, then Export. You'll get a couple of dialogue boxes - you can probably ignore the options in the first one:
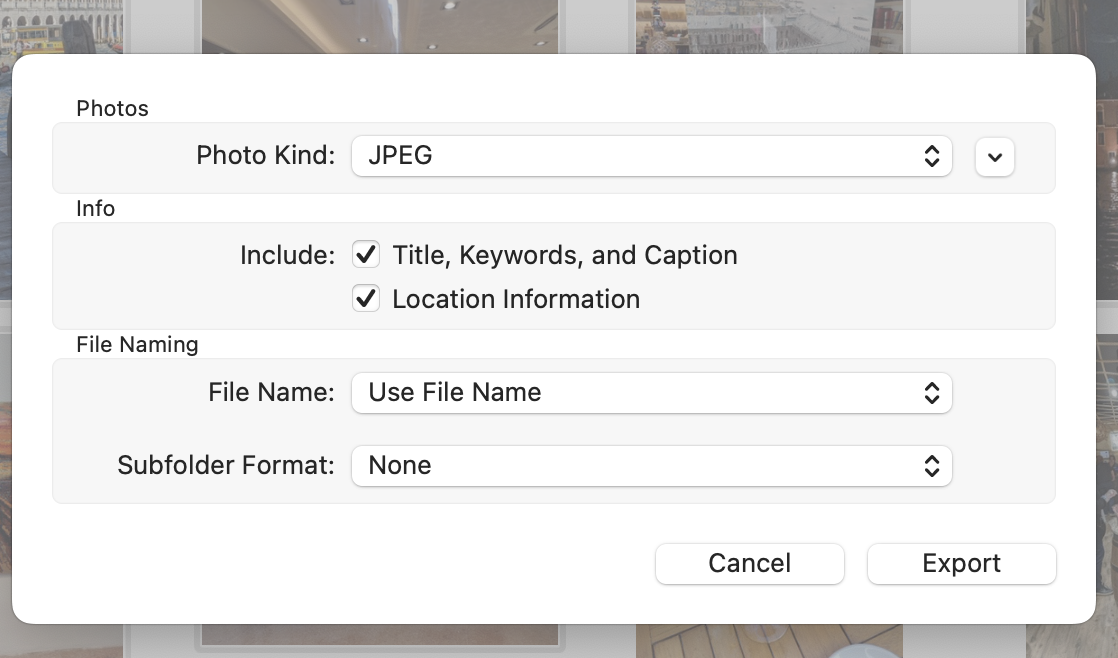
Just click Export. Next you'll see a dialogue box asking for a location for the exported photos:
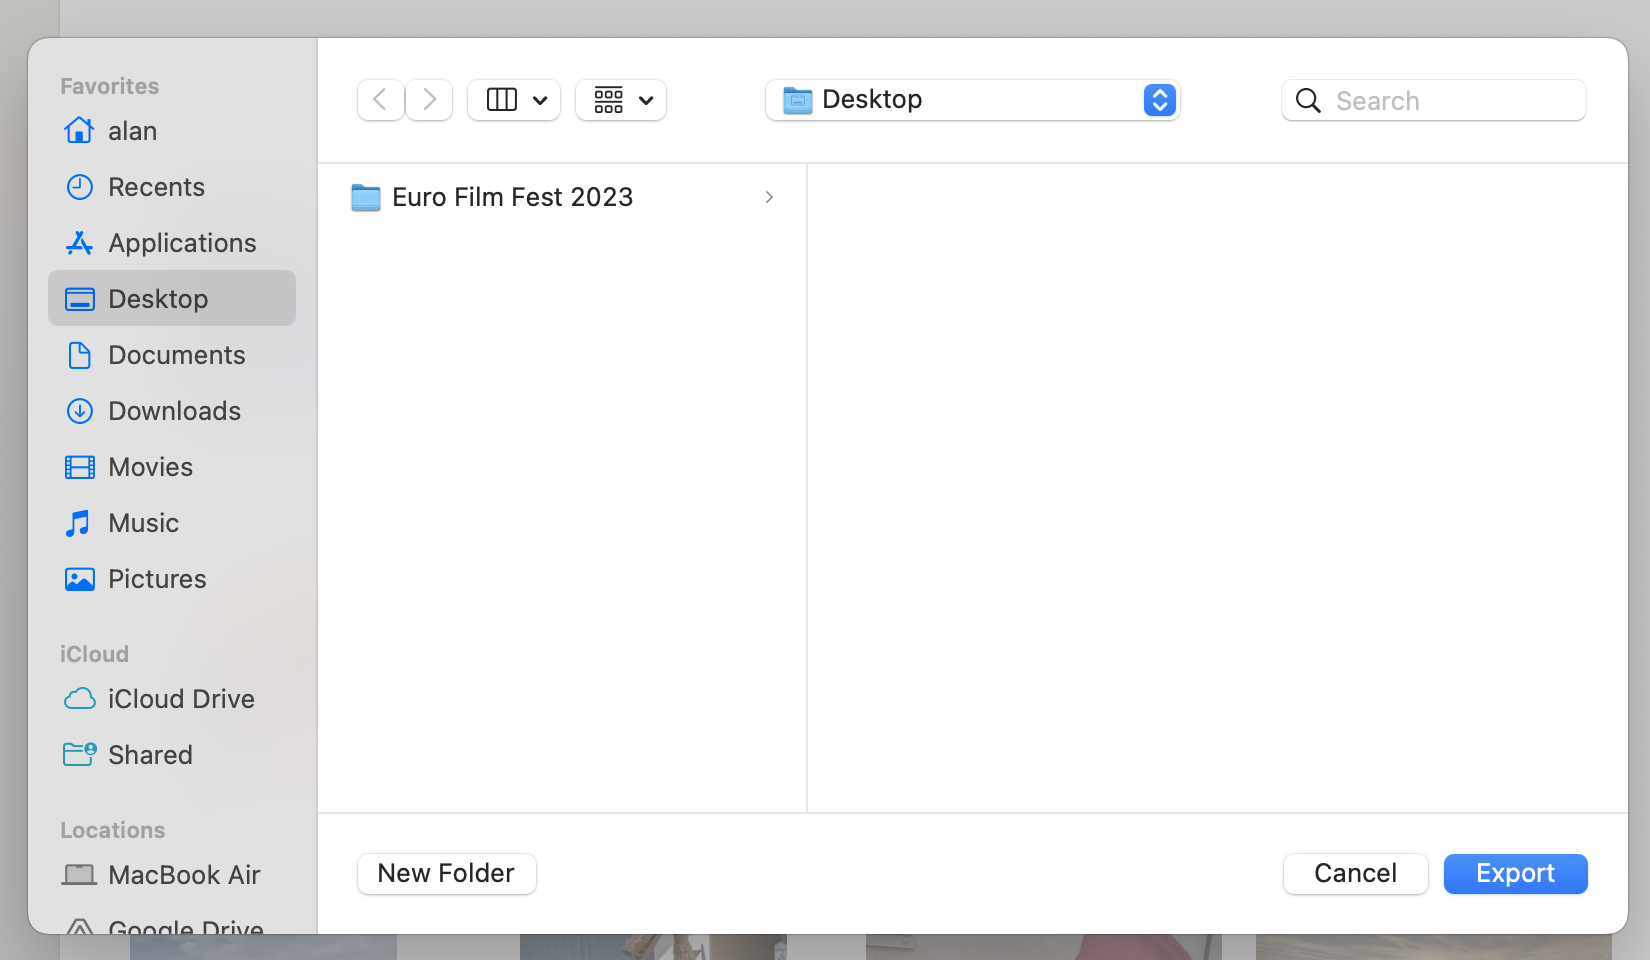
I like to put temporary work files onto my computer Desktop where they're easy to find when needed. With multiple files, I'll first create a folder to keep them all together. When using the Desktop in this way, remember to delete them all when you're done - in this case, you'll still have the original photos in your Photos Library. (And a tidy Desktop is a good thing!)
This is made easy in the dialogue box by clicking the New Folder button, and giving the folder a name. How about 'Book Project'?
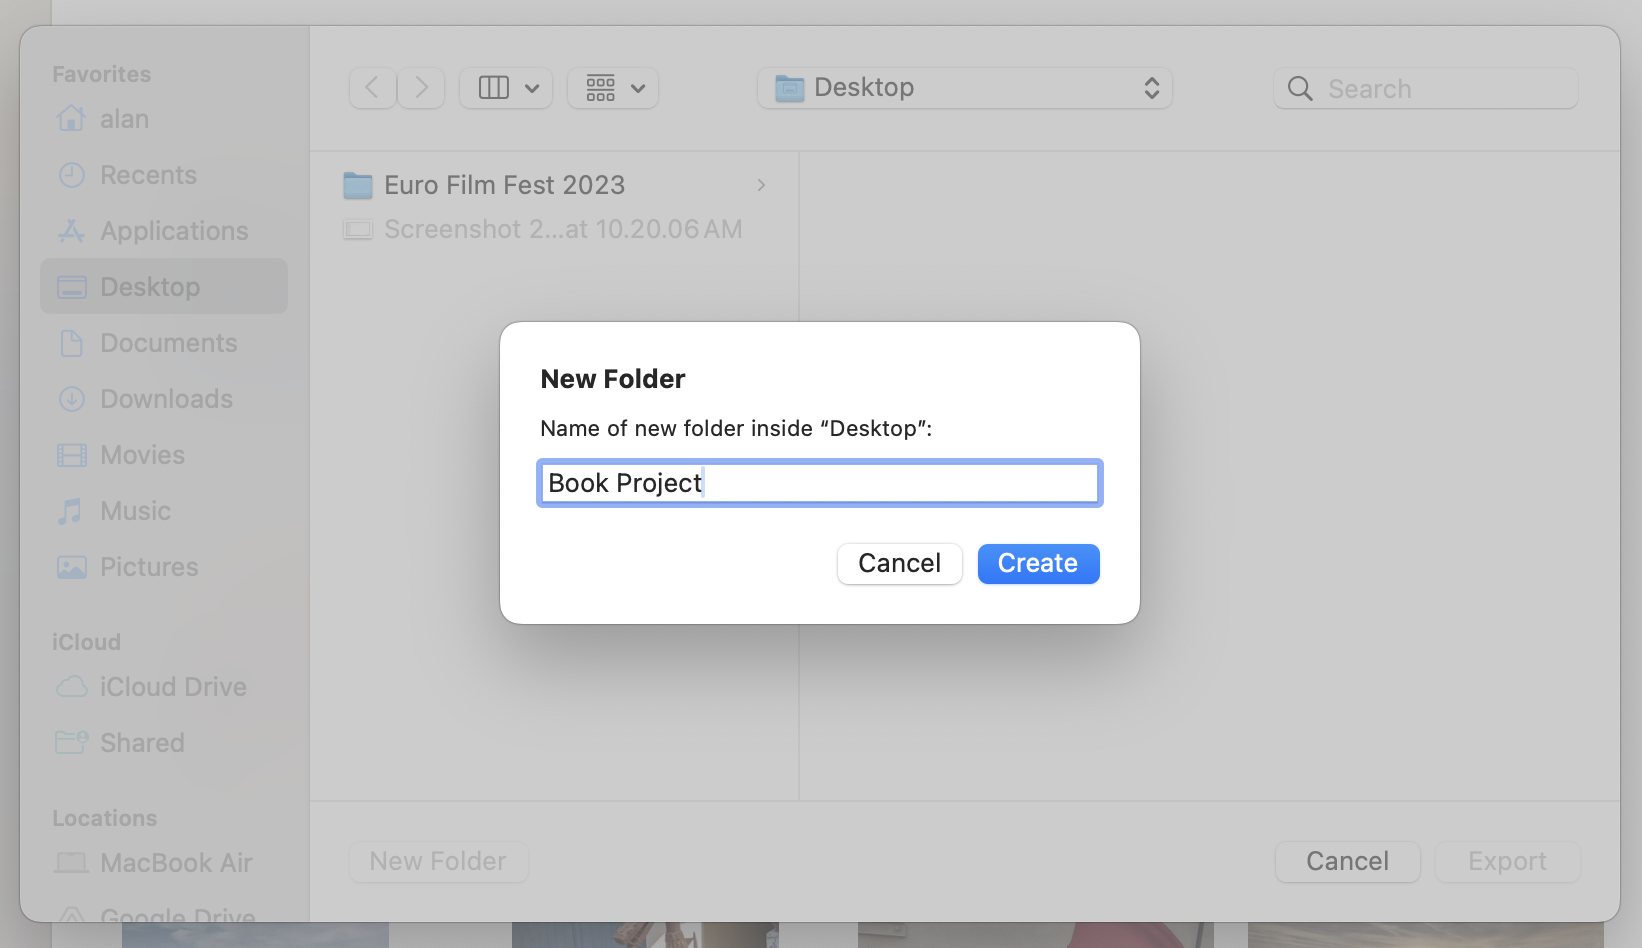
I clicked Create to create a new folder on the Desktop named 'Book Project'... which returned me to the previous dialogue box, now with that new folder listed and highlighted - now, clicking Export exported the 7 photos I'd selected as individual image files in that newly-created folder.
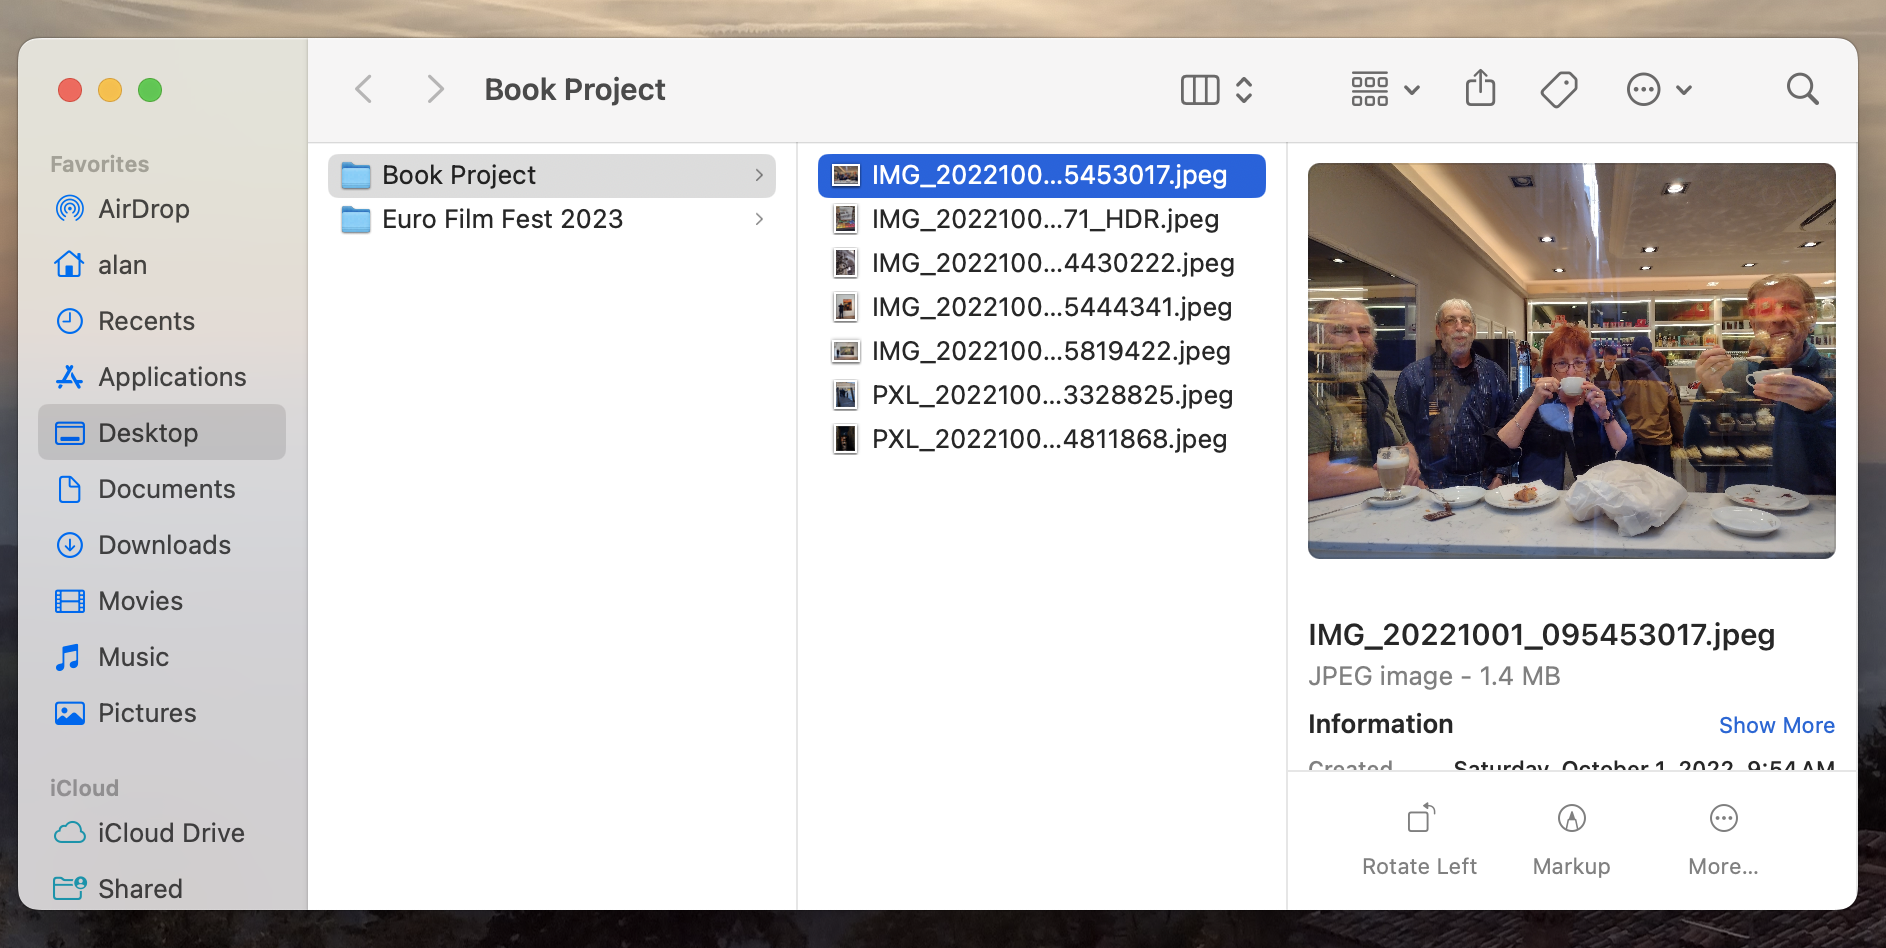
3) Now I've got files that I can upload to the photo service's website. Back to the web page! (It's probably better to have all your photos exported before you go there in the first place!)
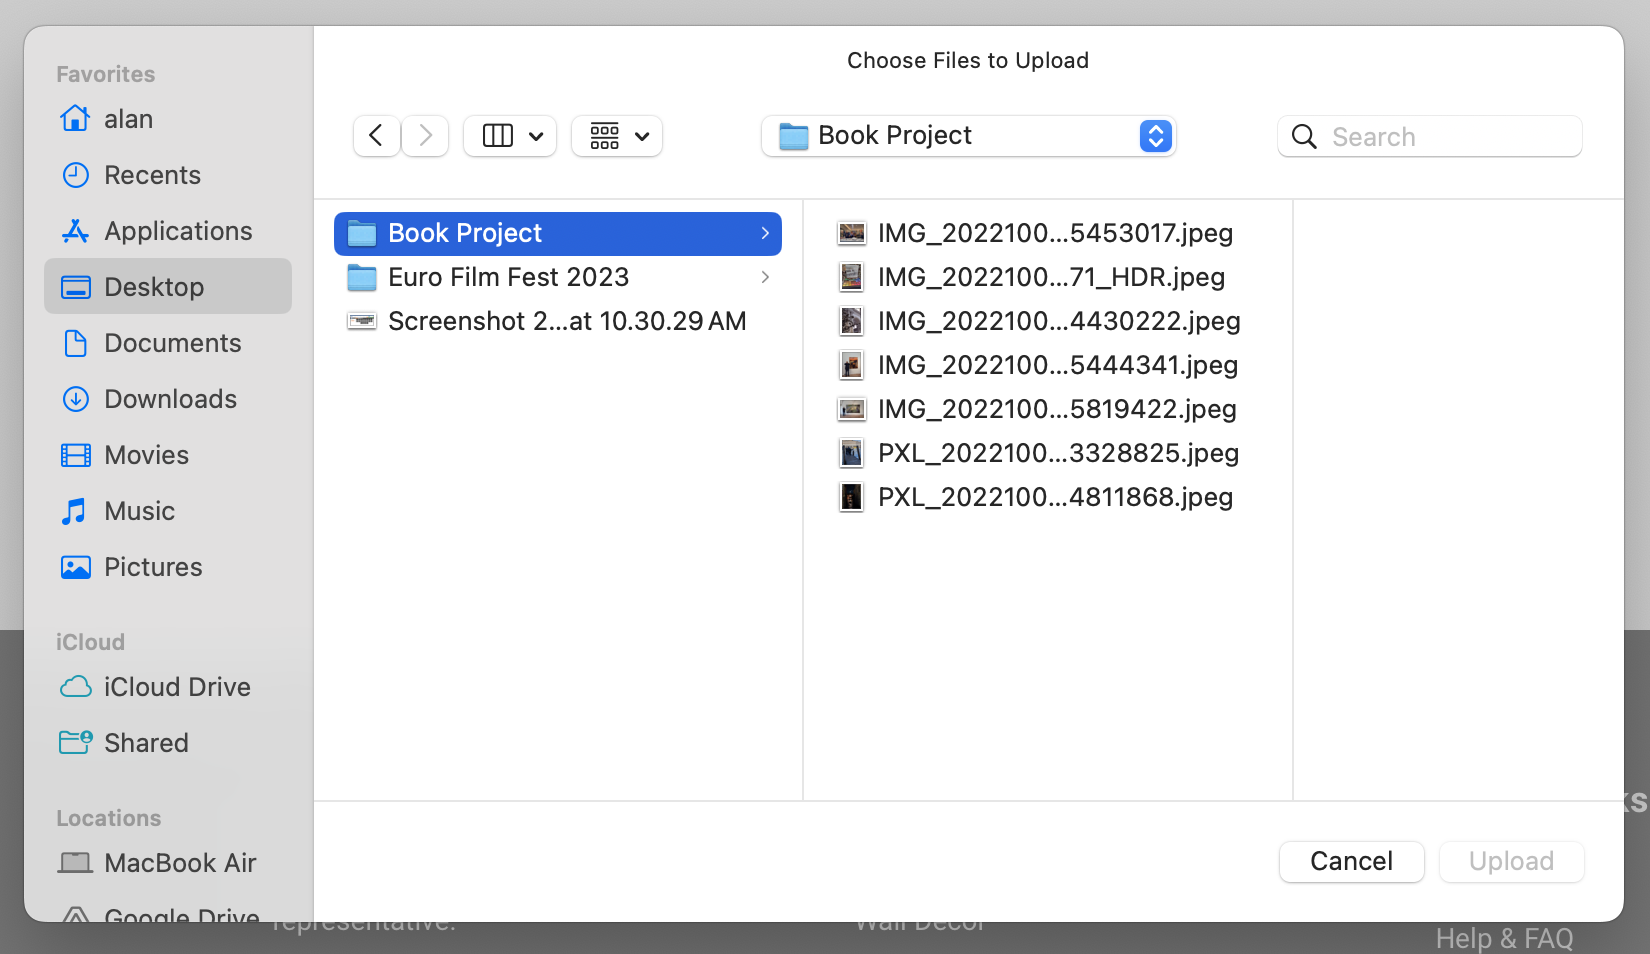
Note how the website's Choose Files to Upload dialogue box is just a standard Mac file selection box - you can select multiple files at once with those same tricks from before: Command+A to select all the files, Click then Shift+Click to select a bunch at once, or Command+Click to select multiple individual files. When you've selected what you want, click Upload.
4) Tada! You now have a bunch of thumbnails of photos in the space that previously said 'This collection is empty'. You're gotten the photos out of your Mac and/or iPhone/iPad and are ready to design your book. Have fun!

Older blog postings....
Stuck on getting photos out of your Mac or iPhone?
By Alan Zisman © 2023-12-06
A friend emailed me yesterday. She said:
I'm having a computer issue and wondering if you're still 'helping' out. It's that I can't upload photos. Mostly I don't know how and can't figure out if I need a specific app or not. And I'm trying to make a photo book for David as a Chanukah present - needless to say, I'm at a brick wall!
With a little gentle probing I found out that the photos were both on her iMac desktop and on her iPhone, in both cases stored in the hardware's version of Apple's Photos app.
We comiserated that one of the nice things about Apple's old iPhotos app (for Macs) was the Projects option - which made it easy to create custom professional-looking books, cards, calendars, and more right in the app, and have them delivered to your door. All with Apple's clean design. Somewhere along the way, that feature disappeared - there's still a My Projects item at the bottom of the Mac's Photos app's left-hand column - but try to add a new project and you're taken to the Mac App Store and present with a list of add-ons to various 3rd-party services.
I've used the first option, Mimeo Photos, and it was okay. It could access photo buried in your Mac's Photo Library just fine, made reasonably attractive books, et al - though without the old-school Apple panache. But if we're using some random 3rd-party service there are lots of options. Here in Vancouver (BC, Canada) for instance, many people use the local London Drugs chain for photo printing - and they even do books/cards/calendars and all that sort of thing, and have a webpage allowing users to upload photos from home, design projects, and more - just like Apple used to do, but letting users work with Windows, Android, and other devices that Apple never dreamed of supporting.
And Apple devices have a bit of a problem compared to Windows computers, Android phones and tablets and the like. And it's by design. That's because Apple's default photo app (cleverly named Photos on both Macs and iOS devices) hides the actual photos - each a separate file - within each device's Photos Library. So when the user of an Apple device goes to the website of a company like London Drugs and tries to Upload Photos, it's not entirely obvious where the photos are on the device. Apple has chosen to protect its users from the complexity of its file system - but that doesn't always make things easier.
Some 3rd-party services have their own apps which may be able to peak inside Apple's Photo Library - London Drugs, for instance, has an app for iPhone/iPad. But it's a bit of a work in progress - the app currently has an item for creating a book - but then states that this functionality is not yet implemented. Maybe later.
But all is not lost! I went to the London Drugs photofinishing web page on my Macbook and proceeded to walk through the steps to create a new book - there were a few steps to get started, choosing to make a book, choosing the size and number of pages, choosing a theme. Finally, I arrived at a page that showed thumbnails for the book's pages - and on the left, a blank column for the photos, along with an orange link labelled 'Upload Photos':
When I click on the orange link, the question is 'upload photos from where?' The options are this computer, a mobile device, or a cloud source:
You can get photos from multiple sources. Let's look at getting some photos from an iPhone or iPad first. So I clicked Mobile Device. That got me an offer to send a text message to my phone or to view a QR symbol - both would direct my phone to a linked webpage.
Pointing the camera on my iPad at the image of the QR code on my laptop, a message popped up offering to take me to the webpage listed under the image - there, I was given an option to upload photos from the iPad's Photos Library, and I was able to pick an album, pick the images I wanted to upload and all was well. (Note that uploading multiple images will take a few moments).
I also wanted to upload some images from my laptop's Photos Library - that took a few more steps. It was easy to click on the orange button on the London Drugs web page...
But when I chose to Upload Photos From My Computer, unlike on the iPad, I didn't get an option to peak inside the inscrutible Photos Library - just a standard dialogue box to select files.So we need to pause this for a moment and open the Mac's Photos app.
We have to pick the photos we want to use in the Photos app and set them free - the option we want is referred to as 'Export'. So that requires a couple of steps:
1) Select the photos we want to use. To do that, in the Photos app, you first have to view the photos. Maybe they're already part of a single album, or maybe you have to located them in the chronological list of photos. When you find one, click on it (once) to select it - which will put a blue rectangle around it:
You can select multiple photos at once - if your first photo is in an album, after selecting that one photo, you can click the Edit menu and pick Select All to pick all the photos in the album. (Command + A is a keyboard shortcut to do the same thing). Clicking on the first photo, then holding down Shift and clicking on another photo will select everything between the first image and the one that you shift-clicked.Command+Click lets you select more than one photo while maybe skipping some.
2) Once you've selected the photos you want to use, click on File on the menu bar, then Export. You'll get a couple of dialogue boxes - you can probably ignore the options in the first one:
Just click Export. Next you'll see a dialogue box asking for a location for the exported photos:
I like to put temporary work files onto my computer Desktop where they're easy to find when needed. With multiple files, I'll first create a folder to keep them all together. When using the Desktop in this way, remember to delete them all when you're done - in this case, you'll still have the original photos in your Photos Library. (And a tidy Desktop is a good thing!)
This is made easy in the dialogue box by clicking the New Folder button, and giving the folder a name. How about 'Book Project'?
I clicked Create to create a new folder on the Desktop named 'Book Project'... which returned me to the previous dialogue box, now with that new folder listed and highlighted - now, clicking Export exported the 7 photos I'd selected as individual image files in that newly-created folder.
3) Now I've got files that I can upload to the photo service's website. Back to the web page! (It's probably better to have all your photos exported before you go there in the first place!)
Note how the website's Choose Files to Upload dialogue box is just a standard Mac file selection box - you can select multiple files at once with those same tricks from before: Command+A to select all the files, Click then Shift+Click to select a bunch at once, or Command+Click to select multiple individual files. When you've selected what you want, click Upload.
4) Tada! You now have a bunch of thumbnails of photos in the space that previously said 'This collection is empty'. You're gotten the photos out of your Mac and/or iPhone/iPad and are ready to design your book. Have fun!
Older blog postings....
| About This Blog... I've been writing about computers, software, Internet and the rest of technology since 1992, including a 17 year (1995-2012) stint as 'High Tech Office' columnist for Business in Vancouver. This blog includes thoughts on technology, society, and anything else that might interest me. Comments, emailed to alan@zisman.ca are welcome - and may be published in whole or part. You can follow me on Twitter or Google + for notice of new blog postings. |
 |