Business Card

Getting more comfortable with your computer (pt 2):

Working with files, folders and drives

by Alan Zisman (c) 2017 - updated 2022-05-27

http://zisman.ca/filemanagement

email: alan@zisman.ca

Italian translation
Contents:
Just a mess!This is part two of a two-part introduction to working with windows, files, folders and drives on laptop and desktop computers. It accompanies a series of workshops given at Vancouver's Brock House. You can find Part 1 here.

Before we begin - this discussion is aimed at users of laptop and desktop computers - smartphone and tablet users need to look elsewhere. It is primarily aimed at users of Windows computers, though Mac users will find mention of equivalents for them.

Try and imagine a 5-year old's messy room. Toys, clothes strewn everywhere - on the floor, under the bed, in the closet. If a parent tells him or her to clean, the child really has no idea what to do - at best, everything might get stuffed into drawers or into the closet. For too many people - even people whose physical homes and offices are reasonably tidy and organized - throw up their hands in dismay faced with the task of keeping their virtual office space - their computer - organized in a way that allows them to easily find what they're looking for.

Are you one of those people? One way to tell is to look at your computer's Desktop - the screen you see when no program is running. Is it covered with dozens of icons in haphazard order? Maybe you need to learn a bit more about Files and Folders and Drives. (Oh My!)

A bit of background:

Files:

Your computer stores information in 'files' - the computer equivalent of sheets of paper with writing on them - instructions for the computer. The instructions may tell it to open a word processor or web browser - these are applications (a.k.a. 'programs' or 'apps') which are stored as files. A file may contain writing that you created with a word processor application. A photo taken with a digital camera (or smartphone) is stored as a file.


Folders:

When you're organizing paper files in a 'real' office, you may put them into folders - ways to store files that are related in some way. In an elementary school office, there's probably a file for each student - organizing paperwork including application forms, copies of health records, and report cards. Even if you've never created a folder, your computer already has folders created by the operating system (Windows, Mac OS, etc) and by each application that you've installed. When you first signed into your computer, it created a folder for your user account and set up a set of folders for you to use to store your personal stuff - folders with names like Documents, Pictures, Videos, Music.

Two things to know about folders:
More about creating and organizing folders in a moment.

Drives:

In the 'real world' when you have a bunch of (physical) folders full of documents you need someplace to put them - typically a file drawer or a multi-drawer filing cabinet or even a room full of filing cabinets. The computer equivalents are drives. And while computer files and folders are metaphors for the physical equivalents, drives are real pieces of hardware. Your desktop or laptop computer has a hard drive or solid state drive inside where the files and folders you access whenever the computer is turned on are stored. You can plug 'removable drives' into your computer - external hard drives, DVD discs, or USB flash drives for instance - to give your computer temporary access to additional files and folders. If you plug a digital camera or a smart drive into your computer with a USB cable, the computer sees it as an external drive - just like a flash drive.

On Windows computers, each drive - both internal and external - gets a letter-name: C: for the internal hard drive, possibly D: for the built-in DVD drive, other letters (followed by colons) for other drives that you may attach. These drive letters are less important that they once were - but you should know about them.


File Management tools: Windows 10's File Explorer

Every computer operating system includes a tool or utility for managing files - Macs have the Finder. From Windows 95 to Windows 7, Windows includes a utility name Windows Explorer (see below). Windows 10 renamed its file management utility File Explorer since that's what it does. It's very similar to the Windows 7 version with a few enhancements. Note the two panes - a left-hand pane with commonly accessed folders. You can customize it by 'pinning' folders you often visit to the Quick Access list at the top of this pane. The larger pane lists folders and files; by default, it opens up showing Frequent folders and Recent files.

File Explorer default screen

If you prefer, you can change the default view to This PC. (Click on the This PC item in the list on the left to see what that will look like).

If you want to do that, first click View near the top of the window - this will open the View ribbon. Look for an icon labelled Options. Click it. This will open the Options 'dialog box' - the top item reads Open File Explorer To:  and has two options: Quick Access and This PC. Pick one, click OK.

Also from the View ribbon, you can customize the view, letting you see larger or smaller sized icons or a list with details like date modified, file size, and file type.

In that Detail View you can sort by name, date, size, or file type by clicking on the category names at the top of the list. In some views, you'll also get a Preview Pane on the left, letting you preview the contents of a file without having to load it into an application.


Explore the Folder Tree:

Windows 10 File ExplorerFiles, folders, and drives are organized in a way that's similar to the diagram of a family tree... At the root, there's the computer. Branching off is each individual drive. You can use a file management tool like Windows 7's Windows Explorer, Windows 10's similar File Explorer, or the Mac's Finder to look at the organization of your computer's drives, folders, and files. We're going to use Windows 10's File Explorer, but the other 
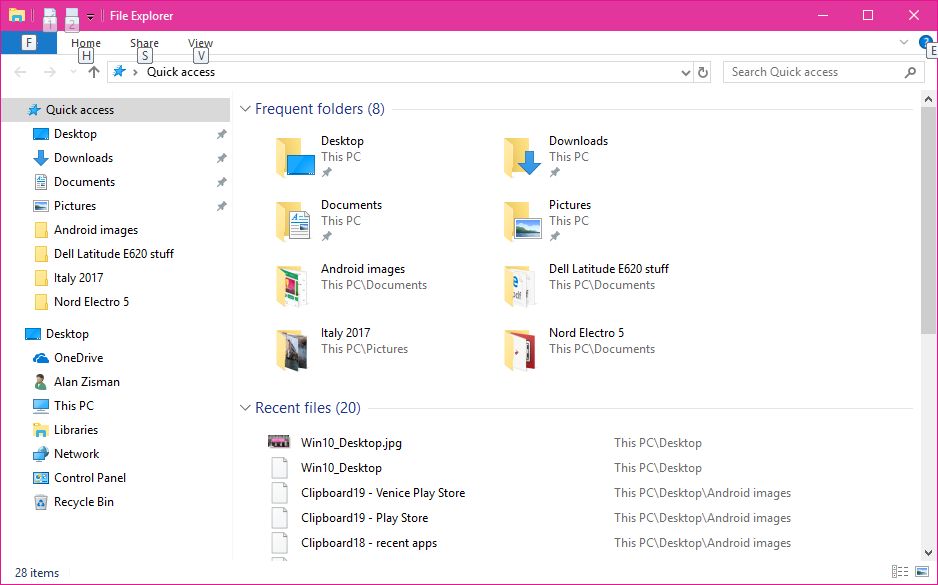
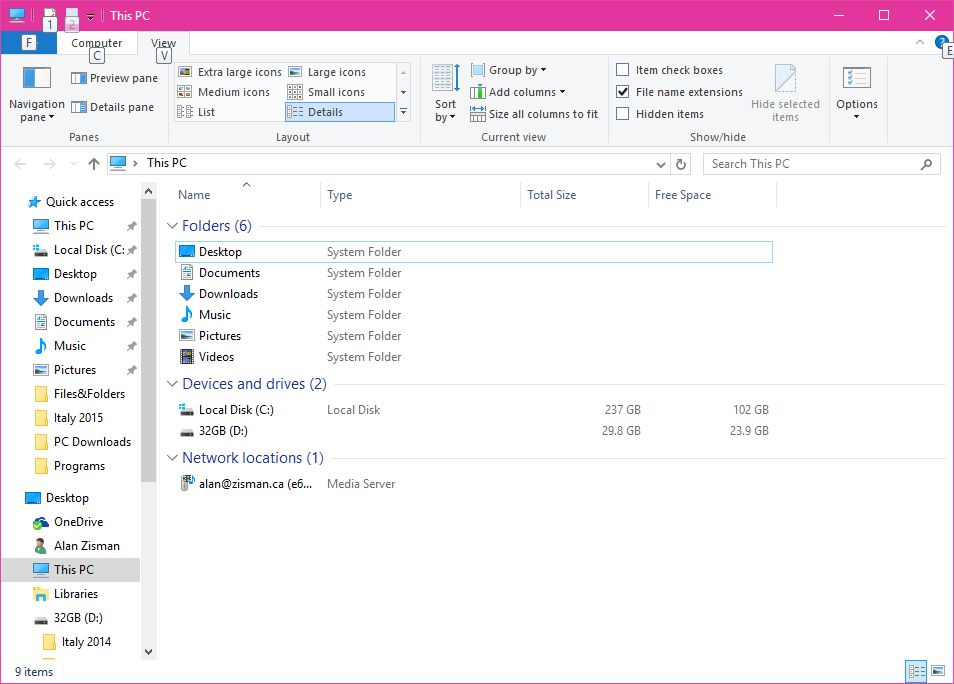
computer operating systems have similar file management tools.

In File Explorer  we opened up with 'This PC' by selecting it from a list of frequently used items on the left. In the centre of the larger pane beside it, it lists 'Devices and drives' on that computer and finds two of them.... 'Local Disk (C:)' - the internal hard drive and '32GB (D:)' - a USB flash drive that was plugged in at the time.

As we discussed in Part 1 of this tutorial, it can be confusing whether to single-click or double-click items. File Explorer adds to the confusion. You can single-click items in the left-hand column. But you need to double-click items in the right-hand, larger area.

So I double-clicked on Local Disk (C:) to display its contents .
Look at the root
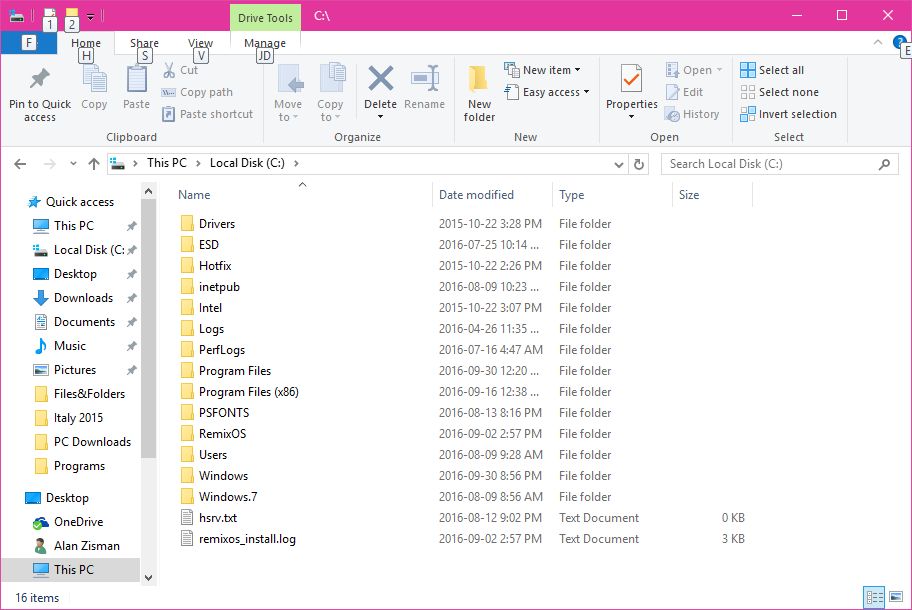
Here is the list of the first level of file folders - all of these were already on the computer when I got it. Folders with names Program Files and Program Files (x86) hold the folders and files for installed programs; when I install an additional program, the installation process creates a new folder (inside one of these folders) to store the files for the new program.

The Windows folder contains folders and files for the computer's operating system - Windows 10. There's also a folder on this computer named Windows 7 -  this computer started life with Windows 7 on it and was upgraded to Win 10.

The Users folder has folders for each person who is able to log-into the computer, making it possible to keep each user's personal stuff private and unavailable to other users.

I double-clicked on the Users folder then double-clicked on my personal folder and saw the image below on the left.

It has a long list of folders, some with the standard yellow file-folder icon, others with special icons: Desktop, Documents, Downloads, Music, Pictures, Videos and more. I didn't make any of those folders - each user automatically gets a set.

I then double-clicked on the Pictures folder and saw the image below on the right:
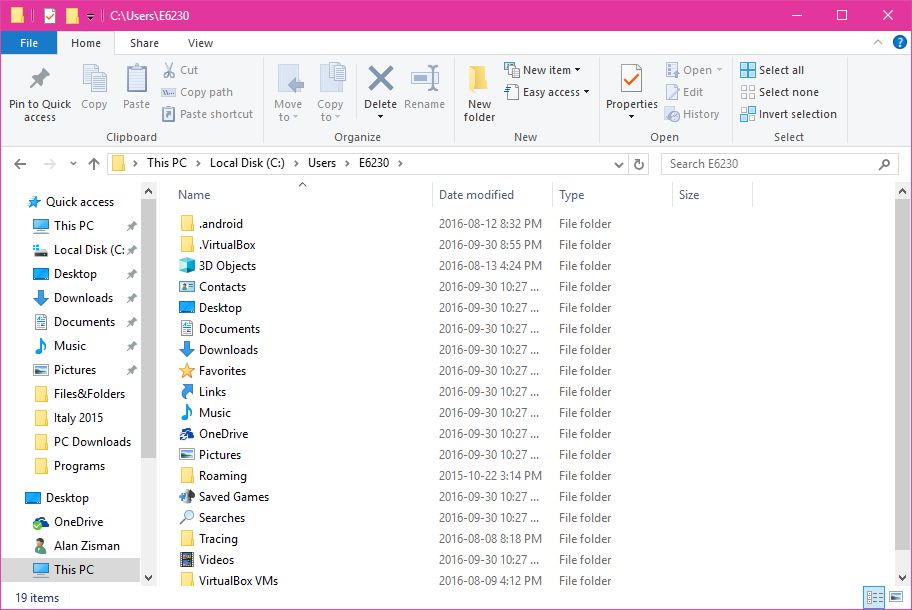
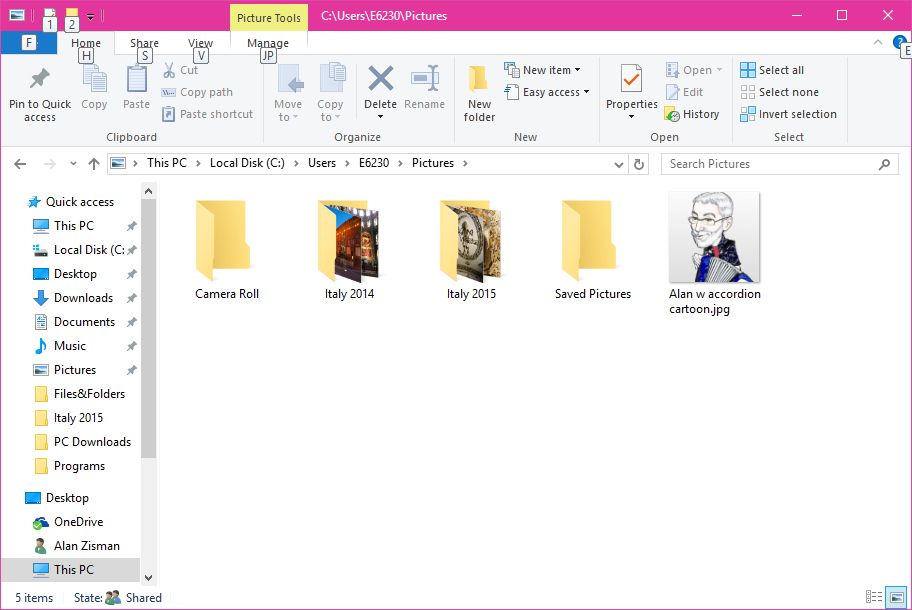
My 'home' folder
Pictures folderThe contents of my Pictures folder includes four folders - two were created automatically, the two Italy folders were made by me and contain photos of two trips I took.

There's also one file loose in the folder - a cartoon image of me playing an accordion. If you look above the yellow folders, you can see the path down the folder tree that I took to get there - This PC > Local Disk (C:) > Users > E6230 > Pictures


Organization:

When you're organizing your stuff on your computer, think about your life - your activites and projects - and how you use your computer. This may change over time. For a long time, I wrote a weekly technology column for a local business paper; I needed to keep years and years of columns organized. In my Documents folder, I created a folder namedArticles. Inside it, I created a folder named BIV (the abbreviation of the paper I wrote for). Within that, I created folders for each year, and then saved the word processor documents I'd sent to my editor inside the folder for that year. Inside the Articles folder, I had other folders named for other publications I wrote for. I have other folders within my Documents folder named Recipes, Receipts, Correspondance, Manuals, and more.

Within my Pictures folder I make folders for trips I take, but also a folder for photos of my grandchildren, a folder for photos of the band I play in, and so forth (not all of these are illustrated in this workshop because they're on another computer).

In my Music folder, the program iTunes does a bunch of organizing for me - it creates an iTunes Library folder and within that, creates folders for each artist. Within the artist's folder, it creates folders for each of that artist's albums. Within the album folder it stores the actual music files for that album.

A special folder is the Desktop - the computer treats it as a folder like all the others, but because you view its contents when no running program windows are in the way, it's a convenient place to store files that you're working on right now. Take care, though, that it doesn't get so cluttered that you can't find anything on it - after you're done working on a file, delete it or move it to a more permanent location in your Documents or other folder. See: 3 Better Ways to Store Your Files Than on the Desktop The point being that there's no single right way how you organize your files into folders. There is a single wrong way, however - not to do it.

If you've let your computer (or your office or bedroom) become a mess, it can be a big job to get your stuff organized. Once that's done, however, keeping it tidy is much less of a chore - and it makes it much easier for you to find what you're looking for.

Give some thought on how you'd like to organize your documents, photos, etc. We're going to be creating folders to reflect that organizational structure.

Remember the Tale of 3 Clicks?

In Part 1 we discussed the difference between single-click, double-click, and right-click. We're going to be using right-click (control+click for Mac) a lot this time around!


Create a new folder

Youd can easily create a new folder anywhere you need one - either on the Desktop or within an existing folder viewed in Windows/File Explorer. Just right-click in any open space (on the Desktop or within the folder) and click (left-click) on the word New then on New Folder from the pop-up menu. A new folder will appear named 'New Folder' - with those words highlighted waiting for you to type in a better name. If you click somewhere instead of typing, you'll have a folder named 'New Folder'. If that happens, click on the name, wait a second or two and click again - now you'll have another chance to rename it. Or right-click on the folder, choose Rename from the pop-up menu. (Those, by the way, are two ways to rename a file or folder).

Selecting multiple files or folders


Often you may want to do something to more than one file or folder. If you want to copy 35 files out of 60 in a folder from one drive to another it would be a real pain if you had to do them one at a time, 35 times. Selecting multiple files or folders is a bit of a trick, though.

Typically, if you click (left-click) on a file or folder - whether on the Desktop or appearing in one of those file management tools, it will be 'selected' - it will appear highlighted so you know it's ready for you to do something to it. It might be useful to be able to select more than one file or folder - but if you click on one then click on a second one, only the second one will be selected. There are a number of tricks to select multiple items at one time. (We'll try this in a moment). All of these will work both on the Desktop or within the Windows File Explorer and Mac Finder.
Copying vs Moving Files and Folders

There can be confusion between 'copying' a file or folder and 'moving' the file or folder. The confusion is enhanced because sometimes, doing the same thing - dragging a file or folder with the mouse and dropping it in a new location copies the file or folder - in other words there are now two of them, one in the original location and the other in the new location. But if you do the exact same steps to a different destination, you may find that you moved the original - in other words there's only one, and it's now in a different location from where it started out.

Here's what's going on:
If you want to have something different happen - for instance if you want to copy a file instead of moving it or move it instead of copying it, there are a couple of ways to change this default behaviour. Here's the easiest - again, right-click to the rescue:
Try this - insert a flash drive into your computer and create a new folder on it. Name it Photo Picks. (Or something!) Go to a folder full of photos in your computer's Pictures folder and pick a dozen or so photos. (Don't spend too much time selecting them - this is just for practice). Now right-click and copy your selection. Go back to your new folder and right-click/paste. Did copies of your dozen photos ends up in the folder on your flash drive?

Shortcuts/aliases

Shortcut iconA special kind of file - named a 'shortcut' by Windows or an 'alias' on a Mac can be a helpful tool for organizing - and finding - files and folders. A shortcut (etc) is a tiny file with the same name as another file or folder that points to the 'real' file's location. Maybe you have a large document saved in a folder several layers deep within your Documents folder - you can put a shortcut on the Desktop making it easy to access the real file. Double-clicking the shortcut will open the file - just as if you were double-clicking the real file. If it's a shortcut to a folder, double-clicking the shortcut will open the folder so you can view and work with the contents.

The icons for a shortcut (or alias) will have a little arrow on top of the standard icon for the file. The filename may be tagged with the word 'shortcut' or 'alias'. You can also have shortcuts pointing to an application. Note the arrow in the picture or the folder shortcut.

The key to understanding shortcuts is that they provide an easy way to access frequently used folders, files, and applications from multiple places on your computer without making copies of the folders/files/etc in all those places - shortcuts take up almost no space on your computer's drive (unlike making copies of actual folder/files/etc). And if you had a bunch of copies of a file in different locations, you quickly would get some that were out of date and a lot of confusion about which one to open when. (Note that Start Menu icons are just shortcuts pointing to your different applications).

Let's imagine you'd like a shortcut on your Windows Desktop pointing to a frequently accessed folder - maybe your Pictures folder. There are a couple of ways to do it - here's perhaps the easiest way (for Windows users):
New shortcut image 1
  • Right-click on the Desktop; from the pop-up menu choose New and then Shortcut
  • You'll see a dialogue box like the one on the left - click Browse and you'll get what you see on the right, letting you select the My Pictures folder.
  • You'll be asked to confirm that location
  • You'll be asked to give the shortcut a name - if you just click OK to both questions you'll get a shortcut on the Desktop named My Pictures
  • Double-clicking the shortcut will open the My Pictures folder just as you would hope
  • Dragging files and dropping them on the shortcut will move them to the 'real' My Pictures folder
  • You can do this within any drive or folder - not just on the Desktop
  • Note - in Win 10, shortcut icons get the word 'Shortcut' added to the name. Not so in Windows 7. The little arrow is your clue that it's a shortcut and not an actual folder.
New shortcut image 2

Note for Mac users - you can put 'aliases' (the Mac name for what Windows-users call 'shortcuts') wherever they're useful to you - but you can't do it in the way described above. Instead, locate the file or folder (in the Mac Finder) that's the target of your alias-to-be and click once to select it. With it selected, cick on the Finder's File menu and choose Make Alias. That will make an alias in the same location as the target file/folder, which is not very useful - drag it to the Desktop or any other intended location. Your alias will have the same name as the original plus the word 'alias' and will have a little arrow in the bottom-left corner of its icon - so you know its and alias and not a 'real'' file or folder.

The Recycle Bin/Trash

Computer operating systems include a way for users to delete or erase files stored on their various drives that are no longer needed, freeing up the space. Sometimes, however, users change their minds and want to get a deleted file back. Starting with the original 1984 Mac, operating systems gave users a simple way do to this using the metaphor of a trash can (Mac) or recycle bin (Windows). Both work in pretty much the same way. You have an icon of a Recycle Bin (on the Windows Desktop) or Trash can (on the Mac Dock). The icon's appearance changed depending on whether it's empty or full.

You can add an item or tems to the Recycle Bin/Trash in a number of ways - all of these work the same way for a single item or multiple items, selected as described in the previous section. Here are three - after selecting a file or files: Note that if you move a folder to the Recycle Bin/Trash all its contents are moved at the same time.

Also note that the items in the Recycle Bin/Trash are not erased; they are stored in the Recycle Bin/Trash. If you want one or more back, you can double-click on the Recycle Bin/Trash icon to open a window displaying the contents. Locate what you want and drag it to a location outside the Recycle Bin/Trash. Or right-click (control-click on a Mac) on an item in the Recycle Bin/Trash and pick Restore (Windows) or Put Back (Mac) - this will put it back where it was when it was deleted. If you restore a delete folder you'll restore the deleted contents of the folder at the same time.

There is a limit to how much you can hold in the Recycle Bin/Trash - typically 10% of your hard drive's size. If you are about to exceed that limit, you'll get a warning, noting that anything else you add will be erased immediately (with no easy way to get it back).

Periodically, if you're sure you aren't going to change your mind about the stuff in the Recycle Bin/Trash, you should 'empty the trash' - right-click (Control-click on Mac) on the Recycle Bin/Trash icon and pick Empty Recycle Bin/Empty Trash from the pop-up menu. (Note that there is no easy way to recover deleted files after you do this).

Important: If you delete a file on your internal hard drive it is moved to the Recycle Bin/Trash; if, however, in Windows you delete a file on an external device - an external hard drive, a USB flash drive, etc - it is immediately erased. It doesn't go to the Recycle Bin and there's no easy way to get it back if you change your mind.

On a Mac, files on both your computer's internal hard drive and external devices are moved to the Trash. Hidden 'trash' folders are created on the external devices to store files or folders moved to the trash. So while these can be easily restored, you won't free up space on those devices by deleting files (which is probably why you deleted the files in the first place) until you empty the trash.

See also: How to recover deleted files


Open/Save Dialogue Boxes:

Dialogue boxes pop up when the computer needs you to enter information. Some of the most common are the ones that various applications use to open a file or to save (or save as - see above) a file. These are specialized versions of the file managers built-into your computer's operating system... as is the dialogue box that pops up in your email software to attach a file to a message.

Here's the Open dialogue box from Windows 10's Notepad accessory. It's got the Quick Access list from the Win 10 File Explorer on the left, while it seems to have the little View icon used in Windows 7's Windows Explorer.

You can rename or delete folders and files displayed in the large pane on the right in the same you might in the full file management program, even though that's probably not something you want to do in the middle of opening a file.

Depending on the program, some Open dialogue boxes may start out at a pre-set default location; others will start out at the last folder where you opened or saved a file. This one is looking at the Desktop.

You're not expected to type in the space labelled File Name - when you click on a file, the file name will appear in that space automatically.

Save dialogue boxes look similar - asking you to type in a File name, and click to find the folder or drive where you want the saved file to be stored.

Again, some programs will pre-set the Save dialogue box to start off in a particular folder - maybe your Documents folder. Others will go to the last place you saved a file.

Some people get in the habit of using Save As in their various documents as a way to make copies of files in multiple places. It's a bit clumsy, but it works!

Open dialogue box

Save vs Save As


Another common confusion is between Save and Save As - typically, these options appear in the File menu of most applications (programs) that let you create or modify documents, edit photos, etc.

Here's what's happening - the first time you save a new document, the computer needs to ask you for some basic information:
If you make additional changes to the document, or close the program and later use it to modify that saved document - or if you open a document that you downloaded or got from someone else but which already has a file name and a location somewhere on your computer - if you click Save the computer assumes you don't want to change the name and location and doesn't ask for that information again - it just saves your changes.

But sometimes you may want to have two versions of the file - the original version and a new version that's been modified in some way. Maybe you have a stock job resumé and you want to customize it for each job you apply for. Or you want to save the new version in a different location - on your USB flash drive perhaps.
If you choose Save As the computer will ask the same questions it did the first time, letting you give the modified version a different name or save it in a new location (or both).

Open With...

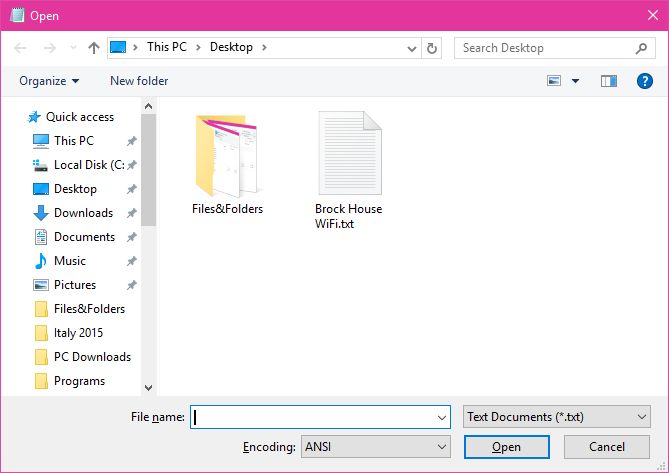
When you double-click a document or media file it's automatically loaded in an application that's able to open that kind of file. Word processor documents open in your word processor (Microsoft Word, for example). You may only have one word processor installed on your computer. But for photos or other images you could easily have several - whether you know it or not. Can you control what application opens your document?

You could open the application first, then use its File/Open option to locate your document and load it into the application that way. Here's another way:

Locate the file on your computer - maybe it's on your Desktop, maybe it's in a folder somewhere on your hard drive or a USB Flash Drive or wherever - when you see its icon right-click (command-click on a Mac). One of the options in the pop-up context menu will be Open With... it will offer you a list of what the computer things are your installed applications that can work with that sort of file. If the program you'd like to use is on the list and you just want to use it with this sort of file now and again, just click on the program name and it will open with your file loaded.


If you want a program that's not on the list or you always want to use a listed program with that file, in this Windows 10 example, click the bottom option - Choose another app (It will be worked differently in earlier versions of Windows, perhaps Choose Program. In any event you'll see something like the following:
Open With....

Open With XP
Open with continued
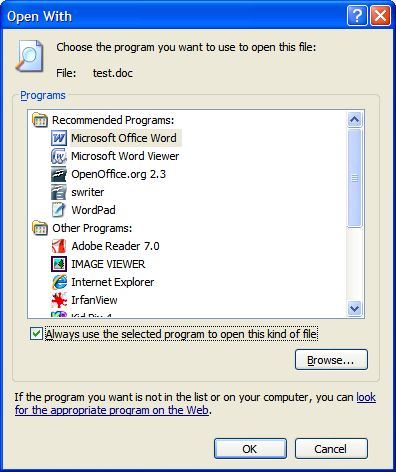
The first image is from Windows XP, the second from Windows 10

The earlier version of Windows let you browse for an application that isn't on the list. Windows 10 has removed that option.

However, notice that both give the option (near the bottom) to always use whichever app (program) you select to open this sort of file - in the Windows 10 case JPEG image files. Maybe you'd prefer to always use, say, the Picasa Photo Viewer in place of the Windows 10 Photos app.

If you do this, all JPEg image files will open that way - but you may have to repeat the steps for some other type of image file.

Note that these steps are not just for photos or images - you might think you only have one word processor installed, for instance - try this on a saved Microsoft Word document and see how many different programs are on your computer that can read that sort of file.

Homework: